
Replace the complete function, not only the visible button
A push button switch replacement must preserve the original action, contact arrangement, panel fit, electrical duty and terminal system. If the button is illuminated, the indicator circuit also needs a separate comparison. A similar cap color or the same number of pins does not establish compatibility. Start with the equipment instructions and complete original order code, then compare a current drawing and contact diagram for the candidate. This guide focuses on equipment panel controls and OEM substitution checks; it does not authorize changes to emergency stops, safety interlocks or proprietary service assemblies.
Das LEMA Drucktastenschalter-Sortiment offers product families to review against an application specification. Product photographs can help identify external features, but they cannot prove a contact circuit, cutout dimension or approval. The replacement needs a documented comparison and a defined acceptance test before it enters service.
Das Handbuch zur Auswahl von Industriebeschlagtastern provides the broader application framework. Use this replacement checklist to compare the original assembly and candidate against that specification, rather than choosing a new circuit function.
Decide whether the actuator, contact assembly or entire unit needs replacement
Confirm the fault before ordering parts. A jammed cap, damaged contact, loose terminal and failed indicator can produce different symptoms. Use the complementary Anleitung zur Fehlerbehebung bei Druckknöpfen to separate those faults. A wiring defect or incorrect control-input configuration will not be corrected by installing a new button.
Some panel controls use separate actuator and contact blocks; others are supplied as an integrated assembly. Follow the manufacturer’s service instructions. Do not assume contact blocks from different series fit together because their clips look similar. A mechanical attachment can appear secure while failing to transmit the required movement or preserve contact timing.
If the button forms part of a protective function, determine the exact approved assembly and verification requirements. Replacing an ordinary control with a red or mushroom-shaped actuator does not establish an emergency-stop function. Hold undocumented substitutions where the equipment’s required safety behavior cannot be confirmed.
Record the original installation and markings
Photograph the front and rear after isolating the equipment under its maintenance procedure. Record the complete order code and suffix, cap shape, operator action, contact diagram and terminal markings. Note any keying, locating feature, protective cap, legend plate or retaining hardware. A partial part number may omit the contact arrangement or illumination option.
Label conductors with their circuit and terminal designations before disconnecting them. Distinguish contact wires from indicator supply wires and note any shared common required by the original diagram. Wire color and pin count are supporting observations, not reliable circuit identification. Save the drawings and photographs with the replacement comparison.
Check the panel condition as well. A damaged cutout, cracked mounting area or strained cable can compromise a new component. Record panel thickness and rear clearance from the equipment drawing or a competent measurement procedure. Do not enlarge a panel hole as a routine workaround for an incompatible switch.
Match momentary, maintained and release behavior
A momentary button changes its contact state while operated and returns when released. A maintained button retains its state until another specified action changes it. The replacement must preserve the behavior required by the circuit. A maintained substitution can leave a command active after the operator expects it to stop, while a momentary substitution may fail to retain a selected mode.
Write the required circuit state for released, pressed and returned conditions. For maintained operation, include every latch and unlatch state. The actual machine response can depend on controller logic, so check the equipment signal as well as the switch contact. The momentary versus maintained push button guide explains the difference without assuming the machine logic.
Confirm that any mechanical reset method matches the original instructions. Do not replace a twist-release, key-release or other special actuator with a general button based only on a mounting dimension. The operator interface and the control function must be reviewed together.
Compare NO, NC and contact combinations
Normally open and normally closed refer to the stated unactuated contact condition. Determine that reference condition from the exact diagram, especially for maintained or multi-contact assemblies. Compare each contact independently and record which circuit it serves. A multi-contact assembly may use one circuit for a command and another for feedback or monitoring.
Do not assume that two visible contact terminals identify the full function of an illuminated switch. Additional pins may belong to the lamp, and a shared connection can vary by model. The push button contact-block guide is a complementary reference for contact functions and compatibility. Use the replacement diagram as the final authority for pin identification.
| Replacement check | Erforderliche Beweismittel | Reason to stop and review |
|---|---|---|
| Bedienereingriff | Released, pressed and latched-state description | Command duration or reset method changes |
| Kontaktfunktion | Exact NO/NC diagram for every contact | Required command or monitoring contact is missing |
| Panel interface | Cutout shape, dimensions, thickness and locating features | Fit requires panel modification or force |
| Elektrische Last | Voltage, AC/DC, load and contact material specification | Only the headline current value has been compared |
| Indicator | Supply voltage, polarity and internal circuit | Lamp circuit or shared connection is unidentified |
| Verbindung | Terminal geometry and approved mating system | Connector retention or cable clearance is inadequate |
This qualitative table organizes the comparison. It does not supply universal cutout dimensions, electrical limits or mounting tolerances; those belong to the exact drawings and equipment specification.
Verify the cutout and rear mounting space
Compare cutout shape and dimensions, permissible panel thickness, retaining arrangement and any anti-rotation feature. A nominal family size is not a complete mounting specification. Check the drawing orientation and tolerances, and ensure the mounting method supports the required sealing boundary. An oversized hole can leave a button apparently fixed but incorrectly retained.
Inspect the rear envelope with the connectors and conductors installed. Allow enough space for the specified mating parts and cable routing without pulling on contacts or blocking moving parts. A compact replacement may still need more clearance for a different connector orientation. If a contact block is removable, confirm that it can be inspected and serviced under the equipment maintenance arrangement.

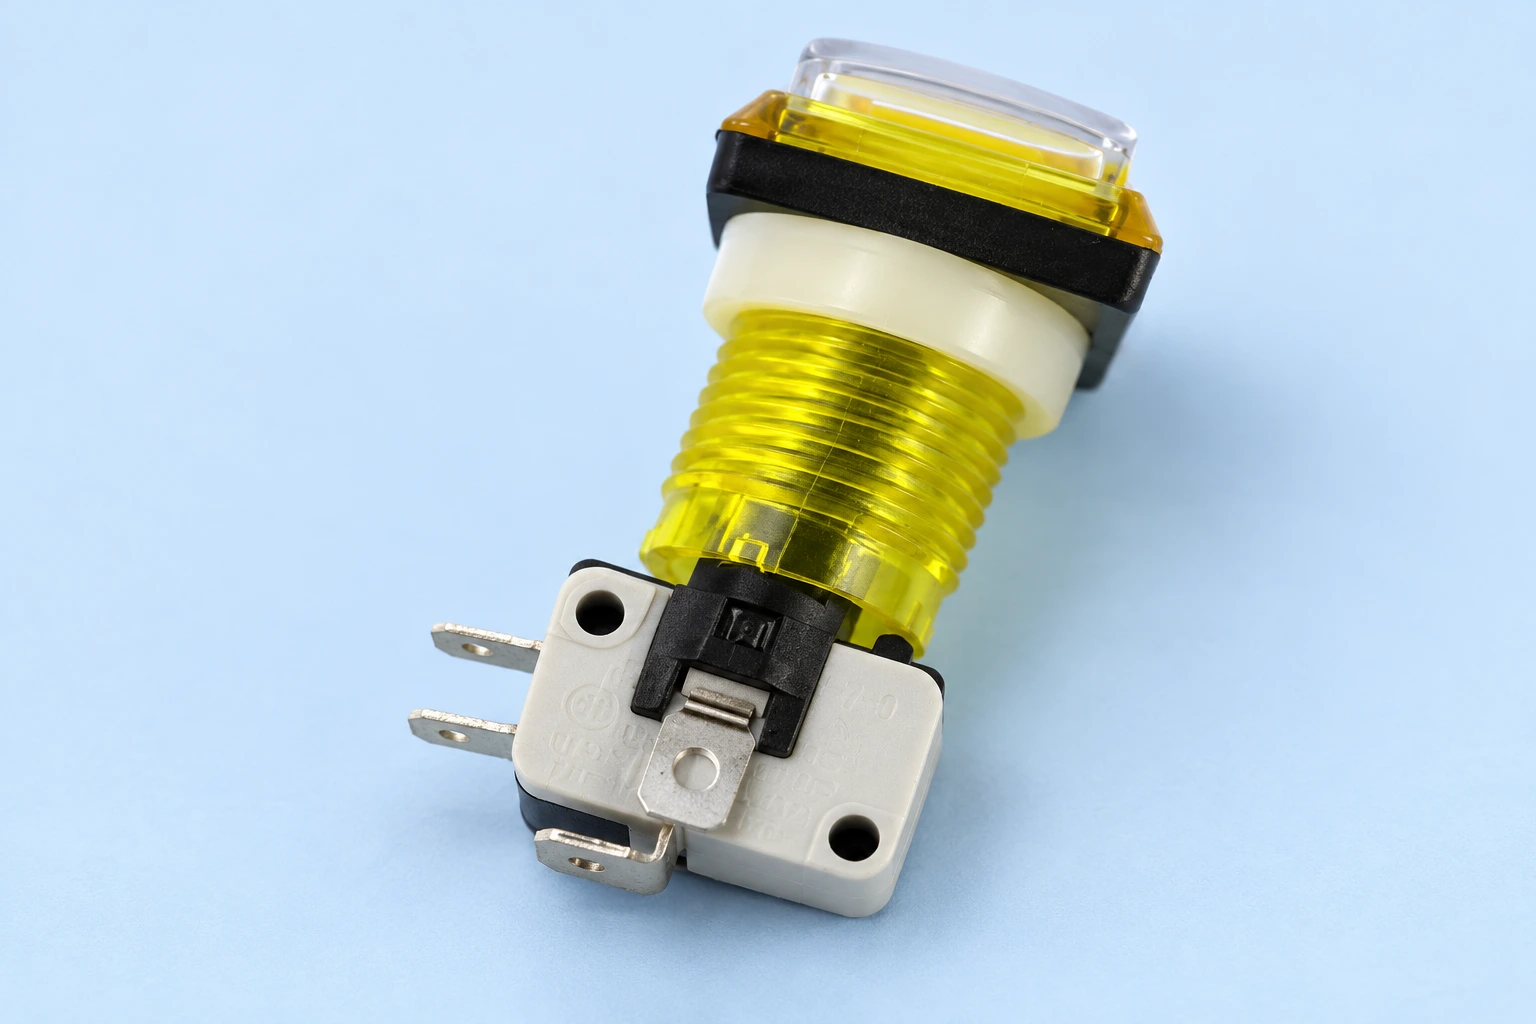
The illustrations use the real LEMA PBS reference with a clear cap, translucent yellow threaded barrel and lower contact assembly. They show external identification and mounting features, not a verified pinout or measured cutout. Do not infer an indicator function from the translucent parts or assume every PBS variant has identical contacts. Ask for the current exact-model drawing.
Compare contact duty and indicator supply separately
Identify whether the contacts switch a controller input, a relay coil or a direct load. Compare voltage, AC or DC, load category and relevant rating conditions. A resistive rating does not automatically establish an inductive duty, and a large current number does not establish suitability for a low-current signal. Match the selected contact material and the actual circuit conditions.
For illuminated versions, compare the indicator supply independently of the contact rating. Confirm AC/DC compatibility, required polarity and any internal resistor or electronics shown in the supplier diagram. Do not connect a lamp pin to a contact circuit based on a generic five-pin drawing. If the original uses a separate indicator supply, preserve that separation unless an approved redesign specifies otherwise.
Untersuchen Sie Heizung, Lichtbogenbildung oder eine ausgefallene Anzeige, bevor Sie einen Ersatz akzeptieren. Eine lose Verbindung, eine falsche Versorgung oder ungeeignete Belastung können den Ersatz ebenfalls beschädigen. Bewahren Sie die angegebenen Unterdrückungs- und Schaltinterfaces auf. Jede Schaltungsänderung muss auf ihre Auswirkungen auf die Ausrüstung überprüft werden, anstatt als eine Anpassung des Anschlusses behandelt zu werden.
Steuerenergie kontrollieren und die vollständige Reaktion validieren
Folgen Sie dem Isolationsverfahren der Ausrüstung, bevor Sie am Knopf oder an der Verkabelung arbeiten. Die OSHA hazardous energy guidance behandelt unerwarteten Start und gespeicherte Energie während der Wartung. Das Drücken eines Stop-Buttons oder das Platzieren eines Schalters auf Aus muss nicht als die erforderliche Isolierung für den Service angesehen werden.
Bei einem isolierten Kontaktschaltkreis überprüfen Sie die erwarteten Zustände und das Freigabeverhalten anhand der dokumentierten Tabelle. Berücksichtigen Sie parallele Schaltkreise. Ein Kontinuitätstest kann das Kontaktverhalten unter den Testbedingungen feststellen; er kann keine Belastungsfähigkeit, Isolierung oder Sicherheitsfunktion beweisen. Überprüfen Sie die Montage, die Befestigung der Anschlüsse und die Kabelzugbelastung vor jedem autorisierten Betriebstest.
Verwenden Sie dann das Inbetriebnahmeverfahren der Ausrüstung, um das tatsächliche Eingangssignal, den angezeigten Zustand, die beabsichtigte Aktion und das erforderliche Neustartverhalten zu bestätigen. Das HSE machinery maintenance guidance unterstützt eine kompetente Wartung mit geeigneten Anweisungen und Aufzeichnungen. Für eine Schutzfunktion führen Sie die entsprechende technische Validierung durch, bevor Sie die Ausrüstung wieder in Betrieb nehmen.
Das untenstehende Bildungs-Video von RealPars erklärt das Testen digitaler Steuerungseingänge und -ausgänge. Es zeigt, warum die Bewegung des Kontakts vom vom Controller empfangenen Signal unterschieden werden muss. Wenden Sie nur die für einen autorisierten Testplan geeigneten Teile an; das Video ist keine Serviceanweisung für Ihre Ausrüstung.
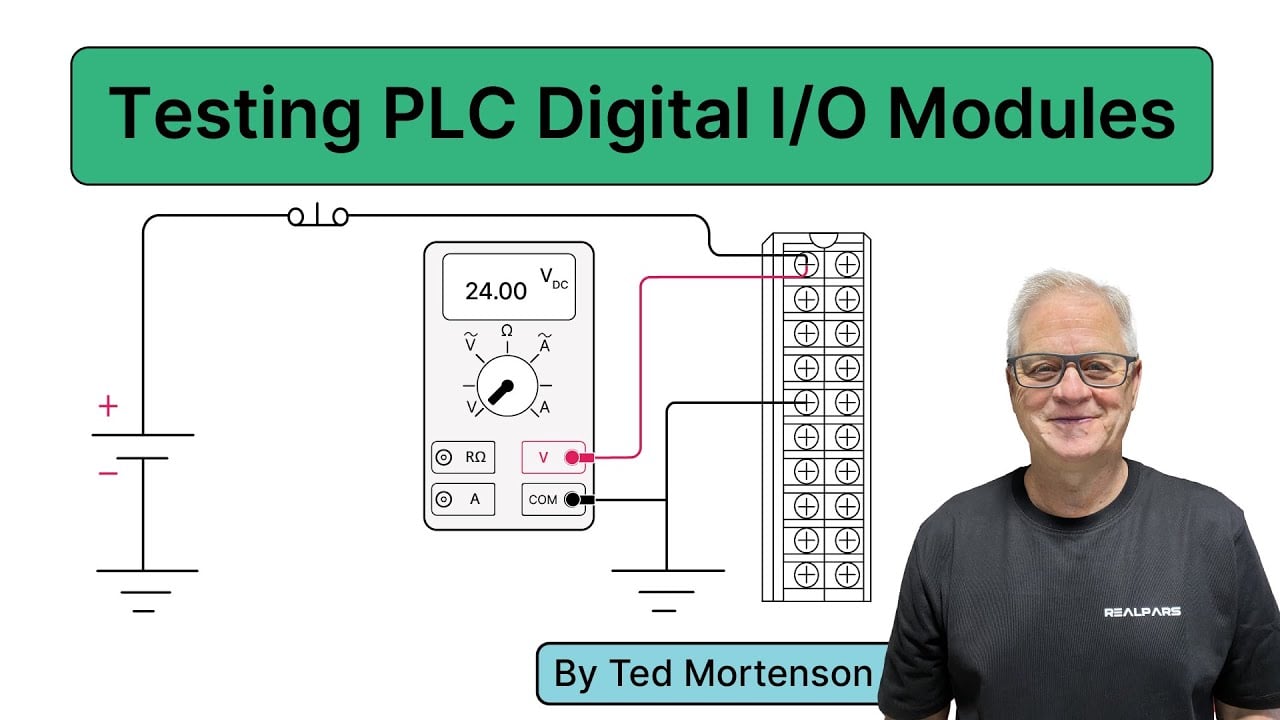
Sehen Sie sich die Erklärung der Steuerungseingänge von RealPars auf YouTube an.
Senden Sie eine vollständige Ersatzanfrage
Geben Sie den Originalbestellcode, das Schaltbild, die erforderliche Aktion, die Schalttafelzeichnung, Fotos der Anschlüsse, Belastungsbedingungen, Umwelt- und Anzeigeanforderungen an LEMA’s contact page. Fügen Sie die jährliche Menge, Genehmigungsbedürfnisse und Rückverfolgbarkeitsanforderungen hinzu. Fordern Sie einen Anforderungs-zu-Anforderungs-Vergleich anstelle einer allgemeinen “Äquivalent”-Aussage an.
Bewahren Sie die genehmigte Teilenummer, die Revisionen der Zeichnung, akzeptierte Unterschiede und Testergebnisse auf. Aktualisieren Sie die Stückliste und die Montageanleitungen bei Annahme eines Ersatzes. Wenn eine kritische Anforderung nicht feststellbar ist, behalten Sie die ursprüngliche genehmigte Spezifikation bei und sperren Sie den Ersatz.
Häufig gestellte Fragen
Kann ein Knopf in derselben Farbe den Originalknopf ersetzen?
Farbe allein bestimmt nicht die Funktion. Vergleichen Sie Aktion, Kontakte, Montage, elektrische Belastung, Anzeige-Schaltung und Geräteanforderungen, bevor Sie die Ersatzlösung akzeptieren.
Kann ich einen Kontaktblock einer anderen Serie wiederverwenden?
Nur wenn der Hersteller die Kompatibilität für die genauen Teile dokumentiert. Ähnliche Clips beweisen nicht die korrekte Befestigung, Bewegungsübertragung oder Kontaktzeitpunkt.
Bestätigt die Übereinstimmung der Pin-Zahl, dass die Verkabelung identisch ist?
Anzahl der Pins kann Kontakte, eine Anzeige oder gemeinsame Schaltungen in verschiedenen Anordnungen bedienen. Verwenden Sie das Kontakt- und Anzeigediagramm des genauen Modells.
Kann diese Checkliste eine Not-Aus-ersatz genehmigen?
Keine Not-Aus-Funktion erfordert die genauen Systemanforderungen, die Eignung der Komponenten und eine entsprechende Validierung. Halten Sie eine nicht dokumentierte Ersatzlösung ein und befolgen Sie die genehmigten Wartungsanweisungen des Geräts.